Tiger Lily’s Axe
 So this is my Tiger Lily Axe, technically speaking it should be able to split in half, mine doesn’t. It was the first prop I had ever made and to be honest, and I just couldn’t wrap my head around it. It’s always a bit of a battle between what you want to be able to create and what is actually achievable given the time and materials to hand.
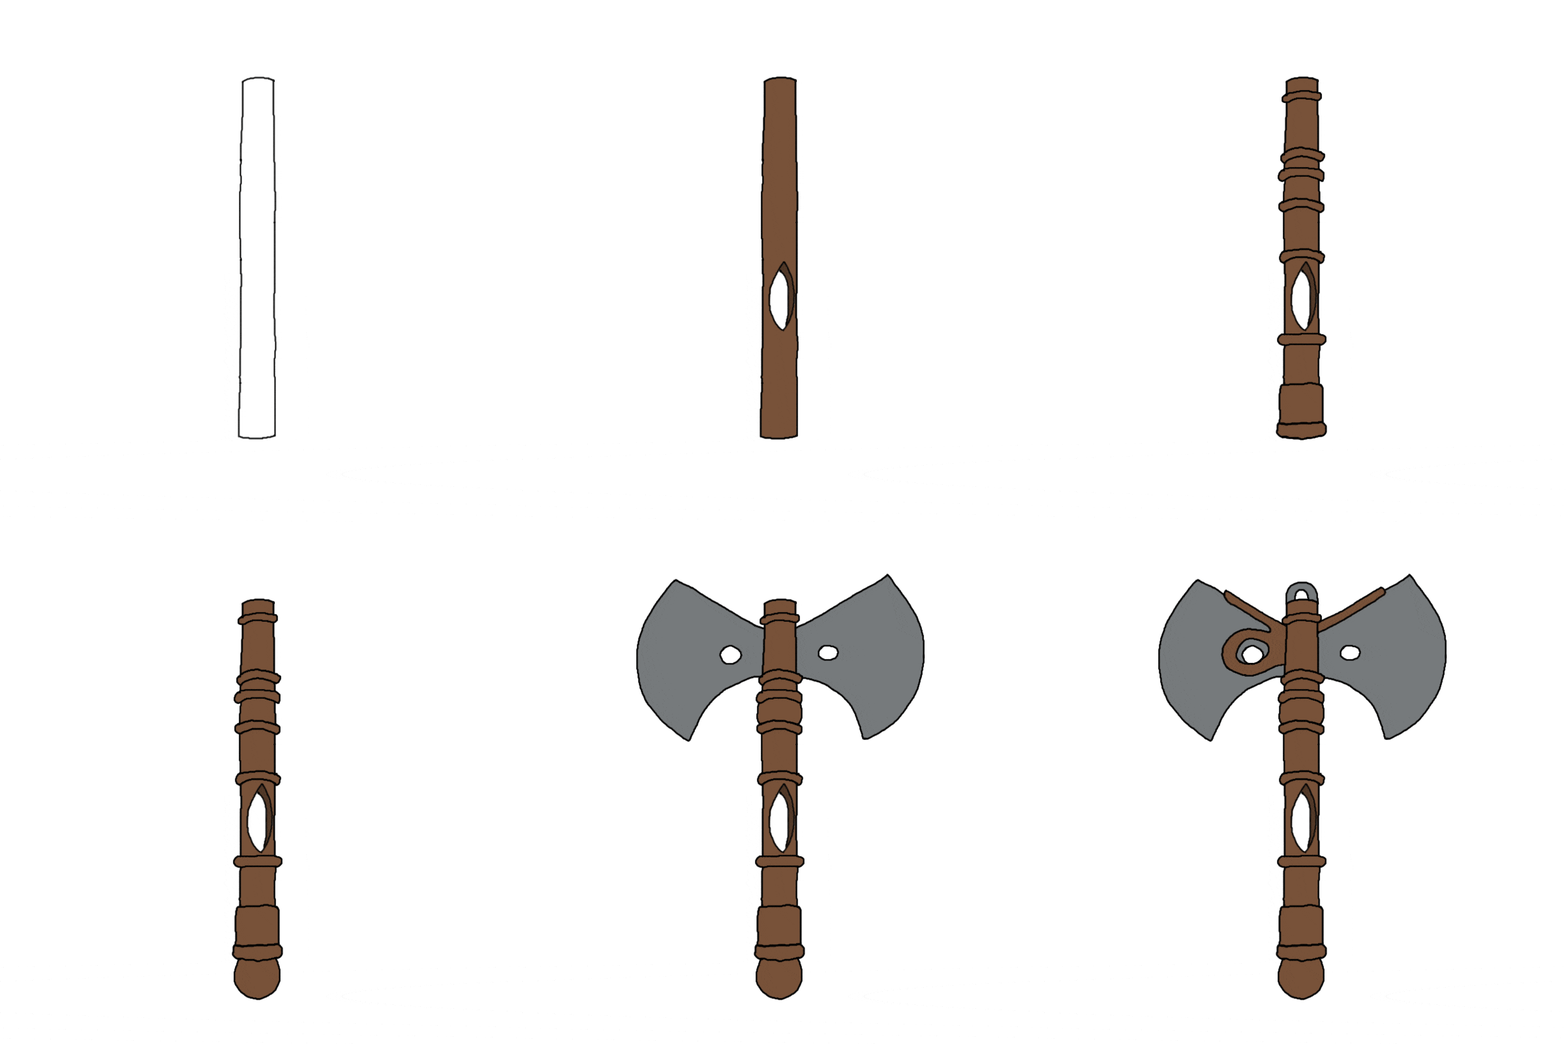
 So for this build, I focused on keeping it simple. The core is a tube from the middle of a roll of tinfoil, it’s sturdy and strong but also, with a little care and time, possible to cut through. To get a decent idea for scale, I found a picture where I could see the axe directly from the side and in her hand, that allowed me to get an idea of size for each of the elements in relation to my hand. With this, I sketched the different parts directly onto the tube, marking where each ridge and feature set.
I figured it was best to start with the cutout section first since it was the feature that was most likely to go wrong. It took a lot of slow, careful cutting to carve my way through the thick cardboard, it wasn’t the cleanest job, but it did what I needed.
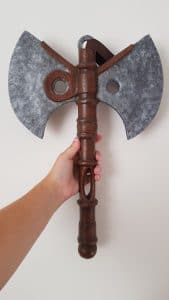
From there I began working from the base of the axe upwards adding the other details. The thin raised sections were long pieces of rolled up newspaper stuck into place. The broader parts were craft foam pieces. The round piece on the end is a polystyrene ball, using a similar ball I also created a rounded section just under the axe head, this was more tricky and involved a lot of careful cutting so that it would fit around the tube. These were all stuck down with a combination of glue and masking tape. The masking tape tended to peel up if left for a while, so the masking tape only held the details in place while the glue dried.
Before getting any further with the details at the top of the axe, I needed to tackle getting the blade into place, this might seem a bit backwards, but it proved easier to stick down the other details with the axe blade out of the way. I wanted to use foam board as the core for the blade as it would give the stability i needed, so i cut a slot into the tube narrow enough so it would sit reasonably tightly. (If I had thought it through more I would have done this before adding the ball on the opposite end as it was quite easy to dent the ball while trying to cut the slots).
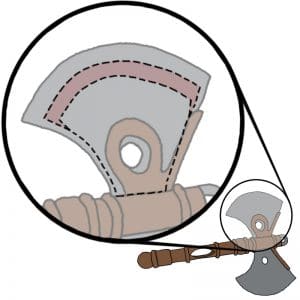 Now to tackle the blade, I wanted to create a tapered/thinned edge, which I achieved through combining various layers of craft foam and foam board. I needed the outer layers to create the smooth face we see, and the inner pieces to give the thickness, taper and strength I was looking for. Looking at the image on the left we can see the various layers and their set out within the blades, innermost part is the foam board, this is the piece that will wedge into the tube so when it’s traced and cut out, it needs to be one solid piece that supports both sides of the axe head. The red tinted section is a layer of thin craft foam cut into to a long curved shape with spikes on each end so it sits at snugly against the edge of the foam board and this helps smooth the transition since its about half the thickness of the foam board. The outermost layer is the craft foam that covers the whole blade, one for the front and one for the back. With this in mind, I traced the entire blade shape twice onto thin craft foam. When cutting the shape out, I also removed the section where the handle would sit, allowing me to push the foam up to the edge of the handle but not cover it, since the additional layers definitely couldn’t fit into handle slot I had previously cut. I also took this time to cut the holes through the foam board and craft foam layers since this was easier to do before glueing everything together. Contact adhesive worked quite well here to stick the layers together, and it was just a case of being very careful to bend the foam evenly both sides when pressing it together, so the blade edge didn’t warp. If you are new to it, I would suggest testing it out with some scrap first as it takes some getting used to.
Next, I wanted to start adding the details on the blade itself; this proved easier once the now assembled blade was slotted in, then glued into place. This was because each piece needed to be a particular size and shape. I chose craft foam for these detail too, and it was easiest to make a paper template to get the size right before cutting the foam, the template also helped me make each side similar. Again each piece was stuck in place with contact adhesive. There is a section I chose to create as in separate pieces, the brown part that crosses over the centre tube. This was so I could get a more crisp crease where the pieces met. If they had been one piece it would have become curved which was not what i wanted, and foam is very easy to push together due to its elastic properties, so it didn’t cause any issues or gaps. As the last detail to close the handle slot at the top and give me a way to attach the axe to myself, so I didn’t have to hold it all day, I created a tab with a circular loop out of a piece of foam board. I made sure to give this area extra glue as I imagined it would potentially be a weak point if anywhere was going to break. I would highly recommend thinking about how comfortable you are holding a prop all day; I tend to find it gets in the way of shopping and gets irritating, so I like to figure out ways to free up my hands where possible.
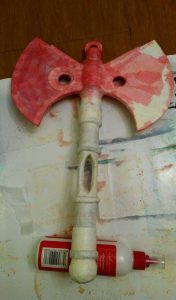
With this, things got messy, the paper mache messy. In the end, I gave most areas two layers. The cut-out section in the axe handle proved a little difficult to cover as it was, so I bulked out the area with some scrap paper. This gave me something to wrap around on the inside edges instead of trying to bridge the gap with glue covered tissue paper, which wasn’t going well after the few attempts I made. I also added extra layers onto the loop at the top and around the ball at the end, I assumed these would also possibly get bashed or pulled. The best tip I can give you for doing paper mache is to take your time and use small pieces of paper where the details get fiddly, especially on the inside of a circular shape. It takes time but pays off and seems to help reduce messy creases in those areas.
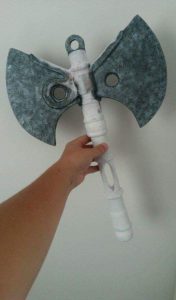
After letting it all dry, the painting could begin. I started with painting everything white, I used a gesso paint because it was all i had to hand in a decent quantity, but its also the paint they use to prime canvases so I figured it would work. After two layers, all of the pink tissue paper was hidden, and it was ready to start adding colour.
It worked out easiest to do the metal effect before the wood, partly this is due to the mottled effect I wanted to create, partly because its the colour that sits inside the holes on the blades. I created a ‘stippling brush’ by placing a cotton ball on the end of the wooden dowel and covered it with fabric. It created a surface I was able to dab paint on with. I started with a silver base then added layers of different silver tones until i was happy, getting the pattern evenly around the details proved difficult and i ended up getting more paint on the areas that would be painted brown than i would have liked.
So moving onto the brown paint, I was cautious about painting around the details. It took a few layers to cover the difference between the white areas and silver areas and get a uniform colour. To create a wood effect, I added a layer of darker brown paint with a dry brush. It is better to work in long smooth motions when doing this to get the wood grain texture and to build up layers as you go. It is far easier to build up colour than it is to remove it. This stage can also be made easier by masking off silver areas before the dry brushing begins.
 With that done, I gave everything two coats of clear spray paint to seal it. It is usually easier to spray the props in sections, so you have somewhere to support the prop from while the other part dries.
I also made a very quick loop out of some faux scrap leather, and a toggle button which threads through the hole at the top of the axe and around Tiger Lily belt so it can easily be hands-free… Woop Woop!
